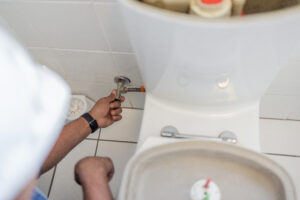
A leaking toilet base is a common yet serious issue that can lead to water damage, mold growth, and increased water bills. Addressing this problem promptly is crucial for maintaining the hygiene and safety of your home. This detailed guide will walk you through the steps to diagnose, fix, and prevent leaks at the base of your toilet.
Identifying the Cause of the Leak
Common Causes
- Worn Wax Ring: The wax ring creates a seal between the toilet and the floor. Over time, it can wear out or become damaged.
- Loose Bolts: Bolts that secure the toilet to the floor can loosen, breaking the seal and causing leaks.
- Cracked Toilet Base: Physical damage to the toilet itself can lead to leaks.
- Condensation: Excess condensation can mimic a leak, so it’s important to differentiate between the two.
Tools and Materials Needed
- Adjustable wrench
- Screwdriver
- Putty knife
- Replacement wax ring or rubber seal
- Sponge or towels
- Caulk and caulking gun
- Plumber’s tape
- Bucket and old towels for cleanup

Step-by-Step Guide to Fixing a Leaking Toilet Base
1. Turn Off the Water Supply
Locate the shut-off valve near the base of the toilet and turn it clockwise to stop the flow of water. Flush the toilet to empty the tank and bowl. Use a sponge or towel to remove any remaining water from the tank and bowl.
2. Disconnect the Water Supply Line
Use an adjustable wrench to disconnect the water supply line from the bottom of the toilet tank. Place a bucket under the connection to catch any residual water.
3. Remove the Toilet
- Unscrew the Bolts: Use a wrench to remove the bolts that secure the toilet to the floor. Keep the bolts in a safe place for reinstallation.
- Lift the Toilet: Carefully lift the toilet and place it on an old towel or a flat surface to avoid damaging the bathroom floor.
4. Inspect and Replace the Wax Ring
- Remove the Old Wax Ring: Use a putty knife to scrape away the old wax ring from the toilet base and flange.
- Install the New Wax Ring: Place the new wax ring on the flange, ensuring it is centered. If preferred, use a rubber seal.
5. Reinstall the Toilet
- Position the Toilet: Carefully lower the toilet back onto the flange, ensuring the bolts pass through the holes in the base. Press down firmly to compress the wax ring and create a seal.
- Secure the Bolts: Reattach and tighten the bolts to secure the toilet to the floor. Be careful not to overtighten, as this can crack the toilet base.
6. Reconnect the Water Supply
Reattach the water supply line to the bottom of the toilet tank and tighten it with a wrench. Turn on the shut-off valve and allow the tank to refill. Check for any leaks around the connection.
7. Test for Leaks
Flush the toilet several times to ensure that the new seal is holding and there are no leaks. Inspect the base of the toilet for any signs of water.
8. Caulk the Base
Apply a thin bead of caulk around the base of the toilet to seal any gaps between the toilet and the floor. This helps prevent future leaks and improves the appearance.
Preventive Measures
Regular Maintenance
Regularly inspect the toilet base and surrounding area for signs of wear or potential leaks. Tighten bolts and replace the wax ring as needed.
Proper Use
Avoid putting unnecessary pressure on the toilet or using harsh chemicals that can damage the wax ring or toilet components.
Professional Inspection
Schedule periodic inspections by a professional plumber to ensure that your plumbing system is in good condition and address any issues before they become serious problems.
Conclusion
Fixing a leaking toilet base is a manageable task with the right tools and guidance. By following the steps outlined in this guide, you can effectively address and prevent leaks, ensuring the longevity and functionality of your toilet. Regular maintenance and proper use are key to preventing future issues and maintaining a safe, hygienic home.
